Thursday, November 26, 2015

Hearing the Lights

How can anyone else hear my beautiful work of art? Just two answers: outdoor speakers and FM transmitters

If you are making a show where people will drive by in their cars, get an FM transmitter to broadcast the music over a radio station. If you are lower profile and you have friendly neighbors, set up up some outdoor speakers. Be careful of the volume and frequency of shows or you'll be THAT neighbor.

Speakers You need to run the speaker wires outside (still more uses for SPT!) . I am currently running them through a window, though I am pondering drilling a hole in the wall because it is getting cold inside! Many people like setting everything up in their garage and running the cables out under the door. I don't have that option, but it sounds good to me.

71NbQGJhdIL._SL1000_.jpg

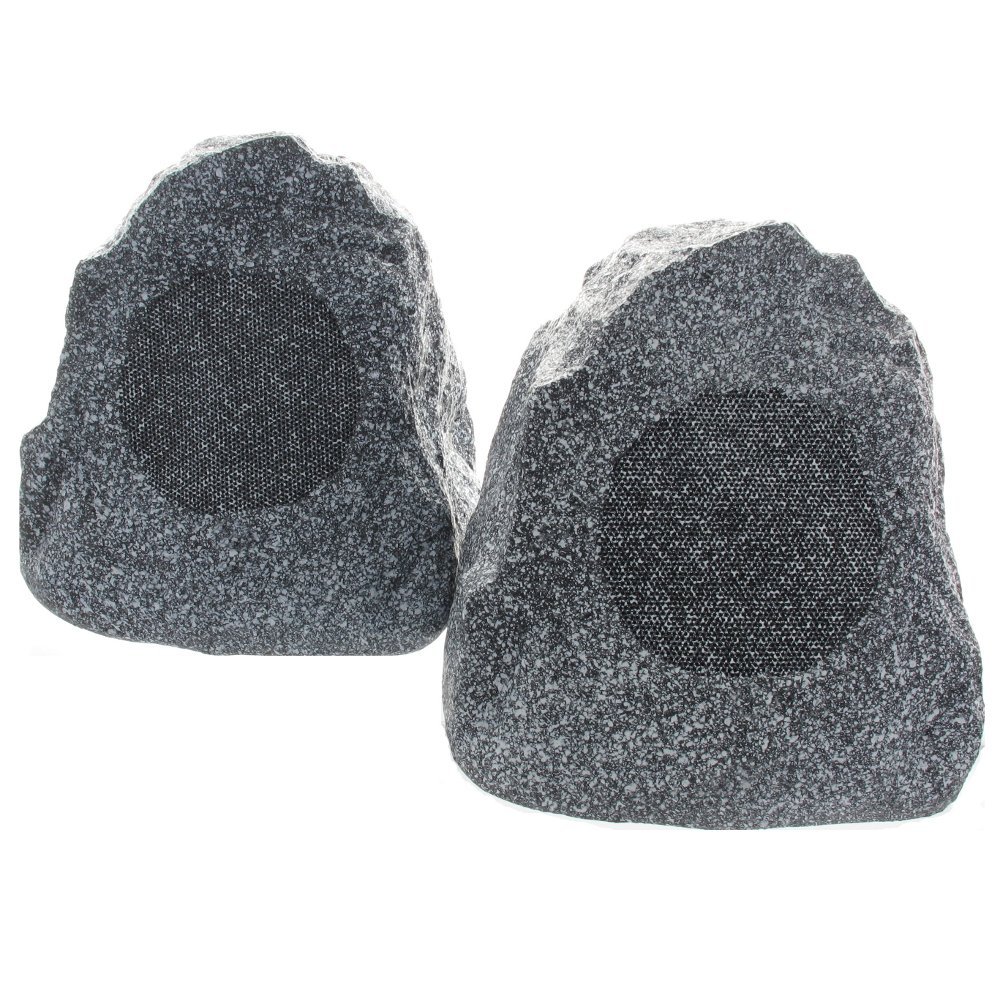
My speakers look like rocks and have worked well for me since I can place them close to the street unobtrusively. They also broadcast thunder sounds at halloween well :-).  I aim one left and one right so people walking by can hear, but I don’t unduly annoy the neighbors across the street.


FM transmitters There are many opinions about transmitters. You can do-it-yourself and reuse an old cigarette lighter transmitter and convert it to AC power, or you can buy a higher quality box with better antenna for 200+ foot range.  I went with the old $20 car adapter since I had one and I am close to the street.  It has the added benefit of transmitting to my old boom box that powers my speakers as well.

FCC compliance - you are a radio station!
WARNING: By transmitting over an FM channel you become a broadcaster in the eyes of the FCC and must be careful not get a large fine and a NOUO (Notice of Unlicensed Operation). Overpowered or poorly made (cheap) transmitters cause interference and can take out broadcast Radio and TV channels and Emergency channels if you are not careful.

You are legal if you are below an arcane measurement of “250 uV/m at 3 meters” (Part 15, FCC code).  What’s that? It depends on power and your antenna. A rough guideline appears to be that if you stay under .1W (100 milliwatts) or a range of 200 feet you are probably OK. Even low powered crappy transmitters can cause interference so beware.


Purchasing
Here’s a few that appear to be highly rated. I have no personal experience with any other than the car adapter which has worked fine for me since my house is 30 feet from the street. Prices are when I checked in 2013.

LOR Whole House Transmitter 3.0 (~$140 shipped). The “name” brand. Some like it, some hate it, but it is one of the few that are FCC compliant.  150ft claimed range.  Also sold under TAW-Global Whole House Transmitter brand for ~$100.

EDM Transmitter (~$165 shipped). Everyone loves this one - requires soldering. Not strictly FCC compliant, but can be adjusted low enough. It is capable of powering a real radio station.

Fail-Safe Long Range FM Transmitter 0.5 W (~$100 shipped) Cheaper and highly rated. Also not strictly FCC compliant without proper adjustment.
Many buyers have been unhappy with CCrane (<50ft) and Whole House 2.0 models.

Two years later….mini trees!

So this is Year Three for me now. I did indeed go from one controller to three (48 channels). I have also purchased about 1500’ of SPT2 wire.  The 1000’ roll was a huge win. It is so much easier to deal with than lots of 250’ bundles. I now have four mini trees, a leaping arch, and a fleet of 10’ pvc pipes wrapped loosely with red, green, and white 100ct strands. The pvc pipes are easy to make, easy to hang, and easy to store. This year it took less than an hour to hang 6 pipes on all my eaves, and now that I have hooks screwed in up there I don’t even need a ladder anymore.

I have not spent a ton of time sequencing as it is a HUGE TIME SINK.  I bought the LOR SuperStar Sequencer.  That was a big win as well as it can get you started with a decent show just by plugging in your Visualization and an audio file. I still like sequencing a couple songs manually, but SuperStar does a pretty good job just guessing.

I am still partial to the $3 cheapo incandescents instead of the $20 LEDs.  So much for high efficiency, but with only 5,000 bulbs total (50 x 100ct strands) it’s not denting the electric bill.  Each 100ct strand is 25W max, so that’s 1200W for the whole show.  A 15 amp circuit can handle 1800W, so I’m approaching the limit there I guess.

3Dtreecloseuo.JPGThis year I added mini trees.  They are a very cool effect.  I wrapped three 100ct strands of red, white. and green and now I can cycle the colors on them.  Some people use tomato cages, I like the floral easels, they are very sturdy and easy to wrap.  Use lots of zip ties.


Next I’ll talk about one of the harder issues for me, playing the music.

Tuesday, December 10, 2013

Leaping Arches

If you’ve watched enough videos you have no doubt seen a Leaping Arch. They are the lights that chase each other over an arc like a fish jumping. A very cool effect, and one I thought would be time consuming and more advanced for later. After watching Jeremy’s CrazyChristmasCrew video blog I decided I’d give it a whirl.

Making an arch involves endless wrapping of about 800 lights around a PVC pipe. Fun right? Most videos I’d seen involved wrapping the wires around a single, very long, piece of pipe. 

Ugh. 

Jeremy’s solution is much better. Wrap one strand around ~12” of ¾” pipe, do that eight times, then slide those pipes onto a smaller ½” pipe. Presto! Leaping Arch. Or in my case, chasing eve.

The multi-pipe solution is better in several ways. You can swap out a dead section easily, storage is easier, and you can re-use sections in different ways if you want. It’s also easier to wrap one strand at a time than to invent ways to spin a 10 foot pipe.

Cost: <$50 complete, if you use $3 incandescents instead of LEDs. So much for low power...

Time: from decision to completion was about six hours, including the trip to the hardware store and many TV breaks while I wrapped on my couch. It is still somewhat tedious, but you should only have to do it once, and the effect is very cool. Conveniently it turns out that a 10 foot pipe will fit inside most small cars diagonally.


Materials (all findable in 10 minutes at Lowes or Home Depot):

  • 10’ of ¾” PVC (they only come in this length at Lowes)
  • 10’ of ½” PVC (make sure the ¾” can slide over the ½” inch)
  • 8 strands of 100 lights. I used multi-color, your choice though.
    I used
    22 foot strands (2.7” spacing) which wraps ~10 feet of pipe perfectly.
  • 8” zip ties
  • 2 nuts and bolts to keep the pipes from sliding off (anything will work here, cotter pins, nails, bolts are easiest) I used 10-24 2” bolts with locking nuts.
  • I got three screw hooks to attach it to my eves too.


Did I say I would get that SPT extension cord next year? I lied. Right now I have my one non-leaping pipe hooked up to one channel since I don’t have enough cords. It will be at least 300’ of extension cord to wire this baby up. That will soon be remedied...

Monday, December 9, 2013

Buying LED Lights

Bottom line: make sure the LEDs you buy are dimmable FWR bulbs.

What follows is uninformed hearsay because I still have not found an authoritative source that explains these issues sufficiently. I have the usual collection of two or three strands per year picked up randomly. I got a few LEDs a while back, some were good some weren’t.

LEDs have the obvious advantage of low power (4W per strand vs 24W) and longer life, but at about seven times the cost (in 2013). The criteria that I’ve found I should look for in LEDs are the following:

  • “Retail” vs “Pro Grade”
  • Dimmable
  • Full Wave Rectifying (FWR) (non flickering)
  • Dome vs Conical (5mm) vs “Classic” (M5/C7) bulbs

One thing I’m sure of, don’t get domed, they act like little blinding flashlights. It’s cool for disco balls, but not so much for Christmas. Conical (chopped off cylinders) work well. They are bright, even, tiny points of light. I prefer the “classic” (M5) look for most uses, but the conical work well for outside tree branches.

Retail vs “Pro”: This seems to come down largely to marketing, but “Pro” is more often FWR (less flickering), maybe slightly thicker wire insulation, and smoother dimming.

Dimmability: LEDs are generally bad at dimming. Unlike the smooth fade of incandescents, LEDs must be programmed to have discrete steps of brightness, and then they just turn off. Some do not dim at all. Make sure you buy dimmable FWR LEDs.

Bulb sizes: M3, M5, C7, C9 , etc. "M" is skinny and long, "C" is old fashioned candle-like bulbs. Here’s a good video from ledholidaylighting.com that explains the different bulb shapes youtube.com/watch?v=9_gXbv6W5lc

As for poorly dimming “retail” lights I’ve read about people trying to add shunts and terminators to their strands to help with spastic dimming characteristics. I have yet to see a real electrical engineer comment on this so caveat emptor, it all seems trial and error. The theory behind shunts is that an LED strand is so sensitive to power fluctuation that adding something that draws more current will smooth out the power and make the whole strand take on the dimming characteristics of the extra bulb. I have not experimented with this, and people who seem to know more are calling BS on this. You can't force a non-dimming LED to dim since it's electronic, but I guess you can prevent a "dimmable" LED from flashing on and off randomly as you try to dim it. I may experiment after this season. I can definitely see the difference in dimming between my newer and old strands though.


Glossary:
LED: Light Emitting Diode. A small electronic light source that can produce any color directly without colored glass. Being electronic they require more precise current to behave well.

FWR: Full Wave Rectifying LED lights. These don’t have the “corner of the eye” flickering that cheaper LED’s have. Is the rectifier the bulge in newer light strands? Not to be confused with “full spectrum” lights.

Rectifier: A rectifier converts AC current to DC so power is applied only on half of the 60Hz AC wave so the diode lights up 60 times a second. This is what caused flicker on older LEDs. Full wave rectifiers provide power all the time (both waves).

Shunt: An extra thing on the light strand drawing more power, hopefully helping the lights dim better. Fiction? I have read about people adding extra C6 incandescent bulbs and even air fresheners.

Terminator: a resistor at the end of your strand. This can help with lower quality “retail” strands.  Apparently LOR has upgraded their hardware to make this unnecessary. More here: crazylightlady.us/TerminatorsHow-To.html

Sunday, December 8, 2013

Sequencing Lights

This is where the rubber meets the road. Sequencing simply means telling a program what lights you want to turn on when. 

You don’t need a song yet, but it’s more fun if you have one. Make sure it is an MP3 (not an mp4 or aac or other audio format). For example, I am using iTunes and I had to click File->Create New Version->Create MP3 Version to get my song to work.

Start up the LOR Sequencer and give it your MP3. There are a couple wizards you can use here to get the basic beat. The Beat Wizard (which most seem to have a love/hate relationship with) is not a bad place to start, results vary greatly depending on the song. I assume this is why a lot of people use techno songs with hard constant beats, they make sequencing a lot easier. Eventually, though, you will probably want to switch to the Tap Wizard. Each wizard generates a Timing Grid, basically a click track that you can attach light events to. For my first song I just did the Tap Wizard and clicked my mouse whenever I felt like something should happen. That gave fairly pleasing results for a first pass.

You can have multiple Timing Grids that you can switch between so there is no harm in trying lots of different things. If you use the Beat Wizard, I would add 4x or 8x on the timings. This gives you quarter or eighth notes to time your lights to.

Now you have a grid that you can click lights on and off, fade in, and fade out. Click "Play" to see what happens.

Nothing.

Sneakily you have to select the “Play” menu and tell it to control your lights. If you don’t have your lights connected you can also tell the “Play” menu to “Control Visualizer”. Oooh, what’s that?

Start up LOR Visualizer and draw in your strands of lights as you think they might look in your yard. Accuracy is not too important here. I drew in four vertical lines, my roof line, and a tree. Now right click on the things you drew and select “Properties”. Down at the bottom you will see “Assigned Channels”. Select “Light-O-Rama Controller” for the device and the channel number (“circuit”). Save all that, and click Play.

Again nothing.

That’s OK. Go back to the Sequencer and verify you’ve still got “Control Visualizer” selected in the Play menu. Now click "Play" again in the Sequencer and you should see your Visualizer window start dancing. Congratulations! You are a computer programmer.

There is a lot more to sequencing which entire magazines and classes have been devoted to so I wont go into great detail here. Hopefully this got you started. I’ll try to write about any clever tricks I’ve found, but the best way to learn is look at other people’s sequences and see what they did.  


Lightorama.com has a lot of videos, so does YouTube. Here's one from CrazyChristmasCrew's excellent 15 part Vlog chronicling the creation of his show. It's a great peek into the effort required to put on a great show.


Glossary:
Timing Grid: Often beats in the music, timings are anchors where you can turn lights on and off.

Sequencing: Creating a sequence of actions on a grid that turn your lights on and off.  Since you have to control so many lights and so many musical beats, this can consume months of time.  It is the reason people say “I started my show in June”.

Wizards: Tools to help make sequencing easier.  Beat, Tap, and VU are a few tools to create timings to your music. There are many more.

Saturday, December 7, 2013

Running Light-O-Rama on a Mac

A brief detour. As a Mac and Linux user for some decades, I was none too thrilled to find out the LOR software is Windows only. My entire life I've felt roughly the same about Windows as I do about Mesothelioma. Much searching for Mac ports or other software revealed that I had no choice but to run Windows. I’ve programmed serial devices in the past and even considered writing my own LOR driver, but even the protocol is kept highly proprietary.

So…I wasn’t about to buy a new computer, too, so I went in search of the cheapest substitute. 

I found one, free! There are many Windows emulators for modern Macs (Parallels, VMWare, BootCamp). All have drawbacks, mostly price. Enter VirtualBox, a piece of free software currently maintained by Oracle, written by Innotek and open sourced by Sun.

VirtualBox is a marvelous piece of software that allows you to run multiple operating systems at once on one computer. In this case, I chose Windows 7 Home 64 bit. You can download the disk image (iso) from Microsoft at http://technetwindows.blogspot.com/2012/10/windows-7-iso-download-free.html

This gives you a 30 day (or 120 day) trial of fully functioning Windows 7. An hour of downloading later and I had Windows running. Sort of. It kept updating, and rebooting, and updating. Grrr. After about 4 days and 130 or so updates it seems to have settled down.

VirtualBox will let you suspend and resume and keep using your Mac as normal. Some caveats: I have to reinsert the USB cable each time I resume and redo the “AutoConfigure/Refresh” dance to get the software to re-acknowledge the Controller. VirtualBox and OSX seem to compete over the USB ports so you may have issues with things like Printers and iPods too. I usually quit VirtualBox when I’m doing regular Mac stuff. Which turns off my show.

What’s the bottom line? VirtualBox is great and lets you make sequences and control our lights and output sound. I’m running my show off my Mac as I write this. But long term, you’ll probably want a dedicated cheapo Windows machine to run your light show day to day.


Friday, December 6, 2013

Getting Started with the LOR Software

The little manual that comes with the software is pretty good at getting the lights turned on. This is Windows software and ONLY runs on Windows (XP or later). Did I mention I have a Mac? More on that tomorrow.

Note: you can play with this software before you get your controller and see simulated light shows on your computer. This is also helpful for light placement later on.

To get your lights turned on:

  1. Download the Light-O-Rama software.
  2. Start “LOR Sequencer” and enter your registration code under “Help->Upgrade Lightorama”. Quit the Sequencer for now.
  3. Plug everything in, especially the USB cable to your computer.
  4. Start the “LOR Hardware” program, change “Max Unit ID” to “10” (that’s 16 in hexadecimal for those geeky enough to care).
  5. Click “Auto Configure” then click “Refresh”. This should get the computer to find your controller.
  6. If you don’t see any error messages click “On at 100%”, you should see lights.
  7. Click things and play around. If you are like me this will occupy you for the rest of the evening.

Next: making those lights dance.